WHEN ACCURATE MEASUREMENT MATTERS.

Calibration – Each measuring instrument shows a certain measurement deviation. The degree of this deviation is influenced by various factors, such as the ambient temperature, for example. Therefore it’s necessary to periodically calibrate ultrasonic flowmeters, level meters, wall thickness meters, energy meters etc. and, in some cases, to adjust them.

Calibration - ultrasonic flowmeters | U-F-M bv

When to calibrate?

Standards and legislation can stipulate that measuring instruments must demonstrably comply by means of calibration. In all other cases it is up to you to determine whether calibration is desirable.

Tip: When a measurement deviation endangers the quality of your flow processes, it is recommended to have your flowmeter calibrated periodically.

How often?

This question cannot be answered unambiguously. Decisive are the application of the flowmeter, the frequency with which the flowmeter is used and the specific properties of the instrument.

We recommend determining the calibration period per measuring instrument individually. Usually the calibration applies for the duration of one year. However, if highly accurate measurements are needed, the measurement uncertainty may be covered for a shorter term (e.g. 90 days).
After a number of calibrations, the course of the measurement deviation is usually easy to estimate. You can then decide to extend the term (for example 1 year, 2 years or 3 years). However, this method is not a guarantee.

Calibration Report
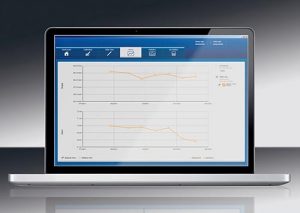
Calibration ultrasonic flowmeters - calibration report | U-F-M bvIn order to demonstrate that measurements – performed with a specific flowmeter – are correct, it is good to record the calibration results in a report.

N.B. In the prospect of legal proceedings, it is increasingly the case that measurement results are presented as evidence (for example due to environmental legislation). If measurement results need to be above all suspicion, a calibration report can be very useful.

CALIBRATE. ADJUST. INSPECT. GAUGE.

Calibration, adjustment, inspection and gauging are often used interchangeably for the same purpose. However, they are all concepts with a different meaning. A brief explanation:

CALIBRATION Calibration is the determination of the deviation of a measuring instrument, sensor, etc. with respect to a relevant reference (the “caliber”).

Only measurement accuracy is considered during calibration. The detected measurement error is noted (in a calibration report), so that the user of the flowmeter can take this deviation into account.

It is important that the reference value is correct. If you, for example, put two measuring tapes of different make next to each other, there will almost certainly be a difference in the accuracy of the tick marks. But which of the two has the most exact designation?
During a calibration, the flowmeter is compared with a reference flowmeter. This reference instrument always has a significantly smaller deviation than the flowmeter to be calibrated.

During calibration, no interventions are performed regarding the flowmeter and no value judgment is made (approval or rejection).

Traceability, that’s what calibration is ultimately all about : The accuracy of the equipment used for calibration must be traceable to a higher reference standard, e.g. ISO/IEC 17025:2005.

ADJUSTMENT is performancing a number of actions to make sure that the measuring instrument, sensor, etc. function is as accurately as possible.

After being adjusted, the flowmeter shows an equally small measurement deviation as the reference flowmeter.

Adjustment is not obviously included in the calibration of a flowmeter. However, it is often chosen if a calibration points out that the measurement deviation is not within the required specifications.

It is recommendable to recalibrate a flowmeter after being adjusted. The measurement results, from before and after adjustment, are included in the calibration report.

INSPECTION is testing a measuring instrument, sensor, etc. against predefined specifications.

The specifications are drawn up according to the applicable requirements. The result of an inspection is a value judgment (approved or rejected).

An inspection relates to one or more aspects. For example, only measurement accuracy can be examined. The exact deviation is now of secondary importance. Only the judgment “too much deviation” or “good” is made. But if desired, the flowmeter can also be checked whether it is, for example, actually capable of measuring bi-directional.

Before a measuring instrument is put into use, it is inspected for the first time. Periodic reassessments usually follow.

GAUGING is a special type of inspection in which a measuring instrument, sensor, etc. is tested against a legal standard.

Basis upon calibration, a flowmeter is officially declared suitable (or unsuitable) for measurements subject to legal accuracy requirements. In the Netherlands, calibration falls under the Metrology Act (formerly known as the ‘Gauge Act’).

The result of gauging is a value judgment : Approved or rejected. As with calibration, there is no intervention in the instrument.

Gauging is all inclusive : In addition to measuring accuracy, the suitability of the flowmeter is also tested.